A DIY mum recently revealed how she completely transformed her staircase for just £65 and the results look impressive to say the least.
The women shared some of her photos on a Facebook group and it understandably gained a lot of attention. 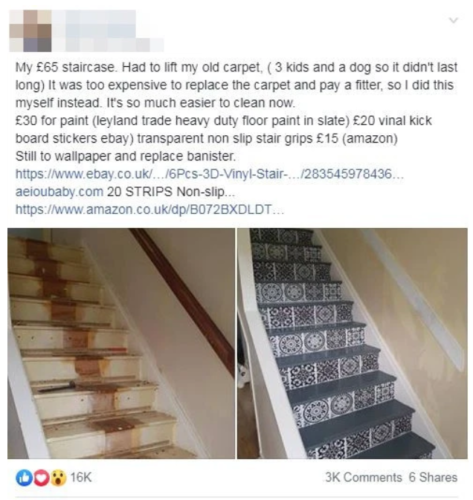
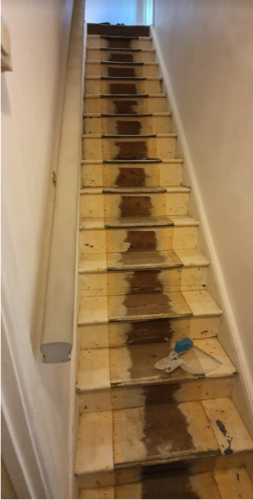
The DIY guru then explained that she removed the carpet due to wear and tear and wanted to swap it for something a little easier to maintain.
“It was too expensive to replace the carpet and pay a fitter, so I did this myself instead. It’s so much easier to clean now. £30 for paint (Leyland trade heavy duty floor paint in slate) £20 vinyl kickboard stickers eBay) transparent non slip stair grips £15 (Amazon).”
She was soon faced with all sorts of questions including how she achieved such a professional finish.
“It took five minutes per stair to sand them.
I kept the old paint on them, and just smoothed them down with an electric orbital hand sander.
I borrowed the sander, however I’ve seen the same one in Asda for £15.”
Incredibly, the post had over 16,000 likes and 3,000 comments.
One person wrote: “Gorgeous. I wish I had seen this before last week… when I got a new hall stairs and landing carpet fitted.”
A few even said they were tempted to try her hack, including myself!
I have been putting off repairing our creaky stairs for a while and this gave me push I needed to get it done as the carpet would have had to be replaced anyway!
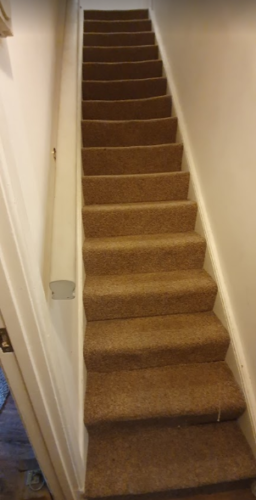
After ripping up my carpet, the damage was worse than I had thought and 3 of the steps had come away from the ledge that they were originally sat on.
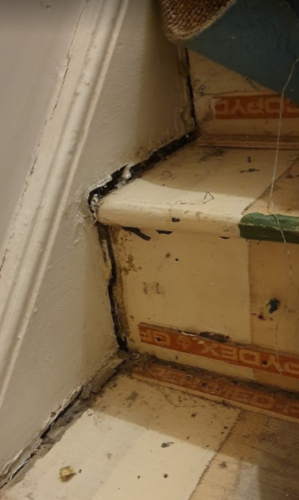
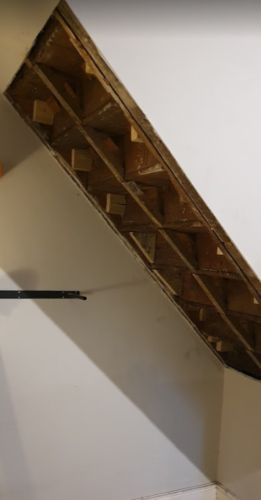
To close the gaps, I began by using a car jack with a long length of wood to lift the stairs back to where they would have been originally. After getting the steps back where they should be, I secured them in using some 2×4 off cuts.
After getting the stairs level and sturdy, I began to remove any old nails and staples using a claw hammer and a pair of pliers.
After filling in any gaps with Polyfilla, I sanded each step using a random orbital sander and started to paint. I had some leftover white paint for the base and found some specific paint for stairs in my local DIY store for £18. The paint had ‘non slip technology’ which meant there was no need for me to buy stair grips after.
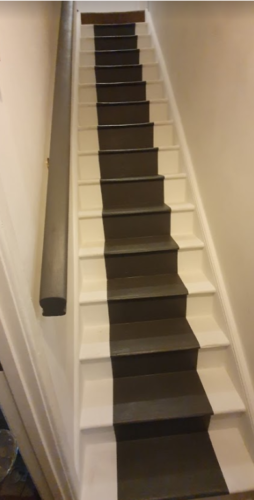
I was pretty happy with the result and as mentioned above, it will certainly be easier to clean. It also really opened up the space and I’ll now be able to see any issues as they happen!
It cost me a total of £18 just for the paint however, I did have a lot of the materials to begin with. If you were starting with nothing, I think you would still be able to achieve fixing and painting for under £65, including buying a sander. In actual fact, you could probably do the job closer to £50.
I should also probably mention I am certainly not a professional and although what I have done seems to have sorted the issue, I’m sure there will be more effective ways to do so and you shouldn’t necessarily use this way of securing the stairs as the correct way.
If you have any suggestions on either fixing or refurbishing stairs, we’d love to see/hear about them in the comments below!
HowTo Team
No comments yet


Leave a Reply
You must be logged in to post a comment.